1. Start with the equipment format.
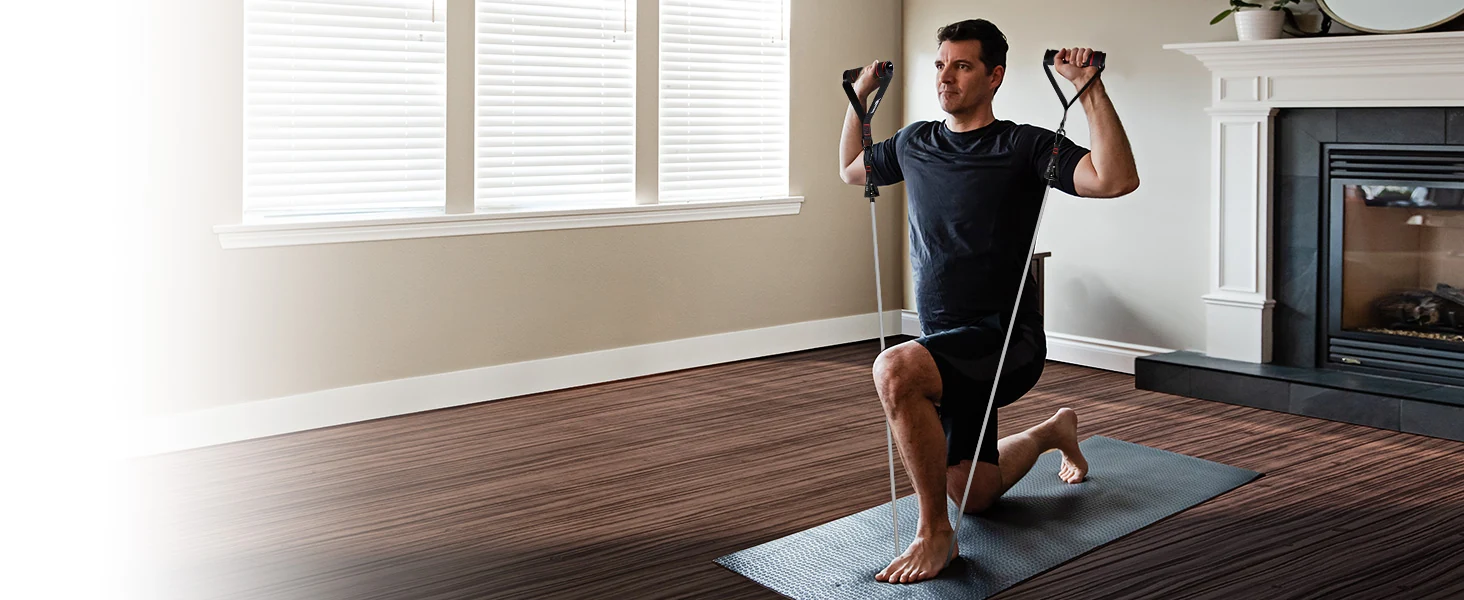
Resistance equipment can look similar in a small photograph while doing quite different jobs. A tube band with clips, a continuous loop and a pull-up assistance system all use elastic components, but their connections and intended arrangements are different. Before comparing pound markings, decide which kind of setup you want to understand.
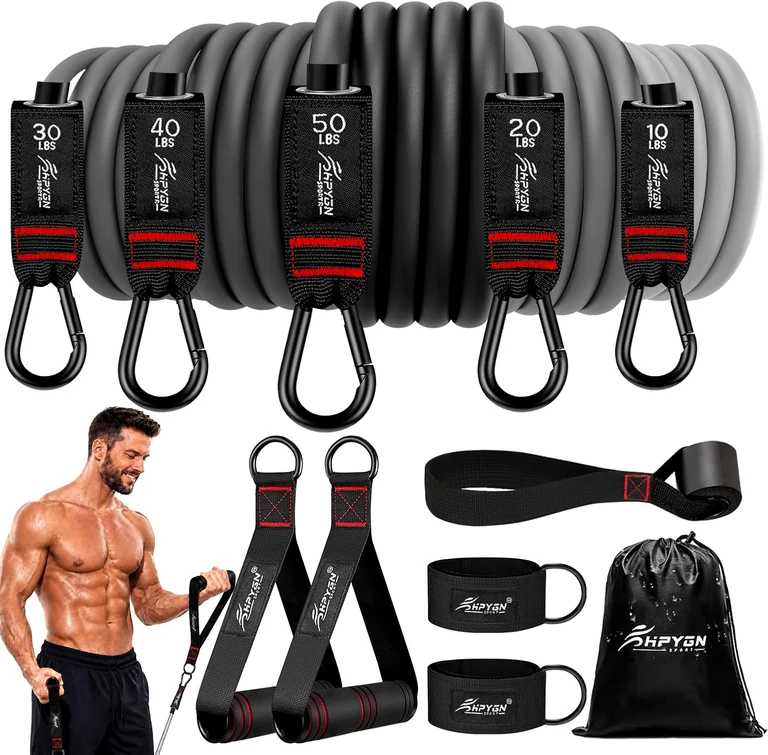
The HPYGN grey 150 lb and orange 300 lb sets use tubes with fittings at both ends. Handles and suitable attachments connect to those fittings. You can identify each tube by its marking and select a supported combination for the movement. This is the format to explore when your shopping question is about a portable kit with interchangeable points of contact.
The rowing-band set is arranged around seated pulling. It combines covered elastic bands with handles, a door attachment and a seat pad. It does not have the rail, moving seat or performance display of a rowing machine. The smaller package is useful to understand on its own terms; it is not evidence that every machine feature has been reproduced.
The pull-up assistance system has a different role again. It connects above you and helps support part of your body weight through its foot supports. In this arrangement, additional assistance can make the movement easier. That is the opposite of adding resistance to a hand-held row. Keep the equipment purpose in view so that similar-looking bands do not lead to a mistaken purchase.
 Enlarge ↗
2. Read a band rating as a rating, not a fixed weight.
The total on a resistance-band kit is a quick identifier. It helps distinguish one configuration from another, but it does not describe a constant load throughout a movement. Elastic material changes its pull as it stretches. Your starting position, the available band length and the way the equipment is attached all influence what you experience.
The grey set has five individual markings: 10, 20, 30, 40 and 50 lb. Added together, those numbers give the 150 lb nominal total. The orange set has six markings: 25, 35, 45, 55, 65 and 75 lb, which add to 300 lb. This arithmetic explains the names. It does not turn a combined band arrangement into a 150 or 300 lb dumbbell.
For a practical comparison, start at the other end of the range. Ask about the lightest individual option you can select. The grey kit begins with a 10 lb marking; the orange kit begins with 25 lb. A higher headline total does not automatically make the orange kit the better choice for every movement or every person.
Ratings from different brands also need context. Makers may describe average tension, maximum tension, a doubled arrangement or another test condition. Unless those conditions match, a higher printed maximum is not a measured demonstration of greater useful resistance. Compare the equipment format, individual bands, construction and included attachments alongside the number.
Which individual bands and attachments will I actually use? That question usually tells you more than asking which package has the largest total.
3. Compare the HPYGN sets by their parts.
Put the contents of each kit beside the setup you have in mind. The five-band grey set includes handles, ankle straps, a door anchor and a bag. The six-band orange set uses a heavier individual range and includes the same broad types of attachments. Their shared format makes a side-by-side comparison useful, while the different band markings remain a meaningful distinction.
| Set | Individual markings | Format |
|---|---|---|
| 150 lb grey | 10, 20, 30, 40, 50 lb | Five clip-on tubes |
| 300 lb orange | 25, 35, 45, 55, 65, 75 lb | Six clip-on tubes |
| 165 lb rowing | 45, 55, 65 lb | Three covered bands and seated-row attachments |
The rowing set should be compared on more than its position between 150 and 300. Its covered bands, seat pad and door arrangement are a different package. If you are looking for a seated-pulling format that can be put away, inspect those parts. If you want a rowing machine with a moving seat and recorded pace, a band kit does not provide those features.
Open the product gallery before deciding. A complete-kit photograph shows what is presented together; the detail views show how the pieces connect. Look for the handle shape, the clips, the ankle-cuff fastening and the anchor. If a photograph shows several options, read the selected variant on the page rather than assuming everything pictured belongs to your order.
Our HPYGN band comparison keeps these configurations together, while each product page opens the matching purchase option. Use the comparison to narrow your choice and the product page to inspect the exact details. The last check still happens in the purchase tab, where the selected option and seller terms can be reviewed before ordering.
4. Plan the working space as well as the storage space.
A carry bag tells you how equipment packs away. It does not tell you whether a particular room has enough space to use it. Consider the full movement, the position of the attachment and the route the band takes when stretched. A clear floor beside a door may still leave a handle close to a wall, a chair or another person.
Look at the room from the intended working position. Note furniture, sharp edges, loose objects and anything that might move into the area. The door needs its own attention: check that other people will not open it unexpectedly and that the installation can follow the product instructions. Do not treat a door as a suitable anchor simply because the attachment fits around it.
A seated-row setup uses the floor differently from a standing tube-band movement. You need room for your body, the seat pad, the connections and the intended range of motion. The photograph may help explain the arrangement, but it cannot assess your floor or door. Check your actual setting before buying equipment around an assumed layout.
Travel changes the setting again. A hotel room may have a different door type, furniture arrangement or available clearance from home. Portability means the equipment can travel; it does not establish that every destination offers a suitable attachment point. Be prepared to leave a setup unused when the surroundings do not match the instructions.
 Enlarge ↗
5. Follow the complete path of the connection.
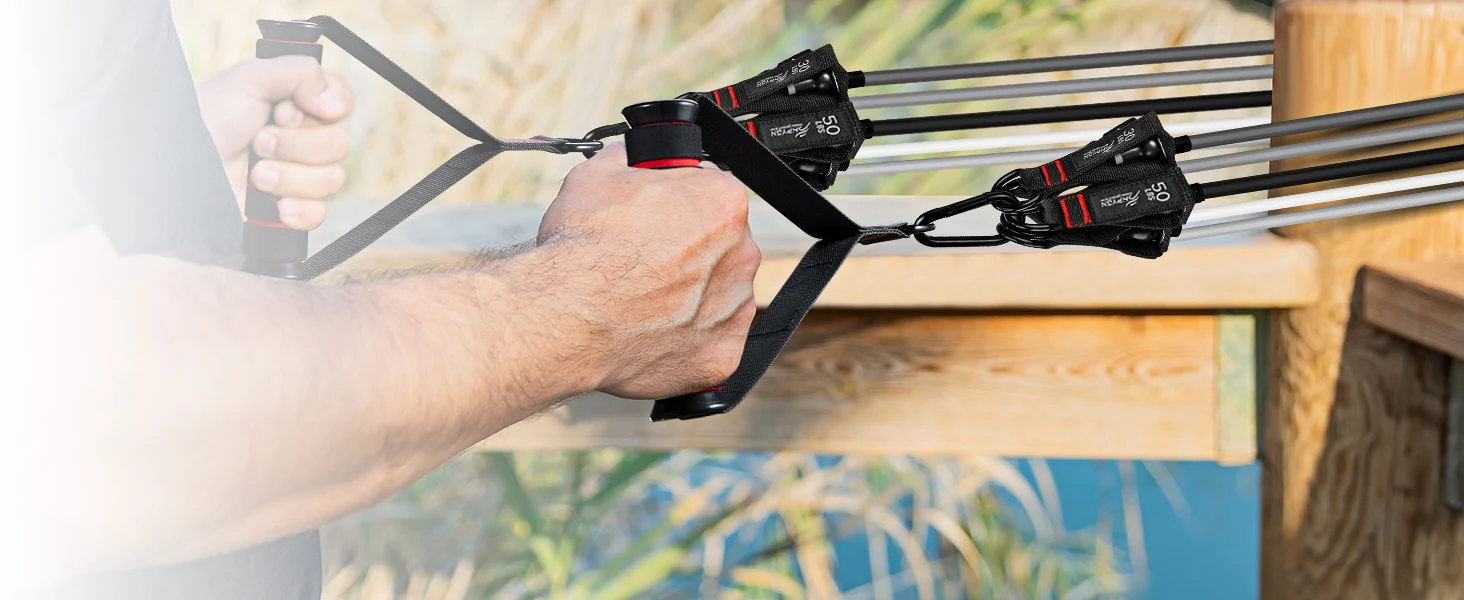
Think through the chain from the point your hand holds to the point the equipment attaches. A typical tube setup includes a grip, stitched strap, ring, clip, elastic tube and an anchor arrangement. Each part needs to suit its role. One impressive component rating does not establish the suitability of the entire chain.
Look at the clips in their actual position. They should be able to close as intended without another component preventing the closure or forcing an awkward angle. A photograph of a closed clip is useful, but the assembled equipment in front of you still needs to be checked. Avoid mixing parts on the assumption that anything which can be clipped together must be compatible.
For a door anchor, use the placement and door requirements supplied with the exact product. Different anchors and door arrangements can have different limitations. This guide deliberately does not prescribe one universal position, because a generic instruction cannot account for the construction and condition of your door or the attachment you received.
Keep the supplied instructions accessible. If the instructions are missing, unclear or inconsistent with the parts, contact the seller through your order before using that arrangement. An image on another website, a different model’s manual or a short social video should not silently replace the guidance for your equipment.
6. Choose an attachment by the job it does.
A handle, an ankle cuff and a cable rope each change where and how you make contact with the equipment. They are not interchangeable labels for the same accessory. Start with the intended movement and the requirements of the machine or band system, then examine the part that connects you to it.
Handles
The HPYGN handle pair combines foam-padded grips, nylon straps and metal hardware. Look at the space around the hand and the way the strap meets the ring. When replacing a handle, compare it with the original equipment requirements rather than choosing by appearance alone. A new grip cannot correct an unsuitable anchor or a worn band.
Ankle straps
The orange ankle-cuff pair adds an underfoot strap to the padded cuff. That construction is worth inspecting if you are comparing it with a simple ankle loop. Check the arrangement with the footwear you expect to use, and follow the fastening instructions. An attachment should not be treated as a lifting sling or suspension strap merely because it has webbing and a metal ring.
Looped cable rope
The white cable attachment has looped hand sections and a central metal fitting. Its shape differs from the familiar two-ended tricep rope. Look at the loop space, the central connection and the machine’s clearance. It supplies a point of contact, not its own resistance. Your cable machine and connector remain part of the setup decision.
The HPYGN attachments collection brings these details together. Use the enlarged photographs to inspect the component you are considering, then check the seller’s current specification for the option you intend to order.
7. Make your setup easy to repeat.
A useful equipment note can be simple. Record the band markings you selected, which handles or straps you used and the anchor arrangement permitted by the instructions. For a particular movement, note the starting position in a way you can recognize next time. The aim is to distinguish a change in equipment from a change in how you positioned it.
Writing only “150 lb set” is not enough to identify a session’s setup. You might have used one band, several bands or different attachments from the same bag. Likewise, using the same band from a different distance can change its stretch. More specific notes make the next session easier to understand without pretending to measure an exact load.
Keep those notes descriptive rather than turning them into an automatic progression rule. The right exercise and resistance depend on the person and the movement. If you are unfamiliar with an exercise, get appropriate guidance instead of assuming that a kit’s maximum or a model shown in a photograph is a target you should reach.
Assistance deserves its own notes. On a pull-up system, record the permitted band arrangement and strap setting, not just the nominal markings. The purpose is to describe the assistance you used. Do not calculate a personal safe-load limit by adding or subtracting printed ratings from your body weight.
8. Inspect, clean and store deliberately.
Before use, inspect elastic sections, handles and connections for damage. Cuts, cracks, punctures, fraying or a faulty fitting are reasons to stop using the affected equipment. Do not try to make a damaged band usable with tape, glue or a knot. Follow the product’s care and replacement guidance.
Keep the area clear of sharp objects, avoid jerking or releasing a band under tension, and respect the maker’s stretch limit. General advice from the American Council on Exercise also emphasizes checking handle connections, wiping equipment after use and storing bands away from direct sun and temperature extremes. The instructions for your specific kit take precedence over a generic rule.
Make storage part of the routine rather than an afterthought. Before putting everything into the bag, separate the components enough to see their condition and let damp equipment dry. A crowded bag can make the next setup harder to inspect if clips, straps and tubes are tangled together. Keep the kit where it will not be crushed, cut or confused with a different product’s components.
Keep purchase information and the instructions together. If a component needs support or replacement, the exact configuration and order record help you identify what you have. A photograph of damage can be useful when speaking to the seller, but do not continue using the equipment while waiting for a response.
Grey · 5 bands
150 lb resistance band set
Five stackable bands with a lighter 10 lb starting option, cushioned handles and a compact carry bag.
9. Check the selected option before ordering.
A long product title may mention several weights or colors. That is a description of a range, not necessarily a list of everything included. Read the selected option in the purchase tab. For example, a title containing 2.8, 3.8 and 5 lb does not mean one weighted-rope order includes all three versions.
The same care applies to resistance kits. Match the band count, markings, color and included accessories to the option you want. If the selected variant and photographs disagree, resolve that question with the seller before ordering rather than guessing which part of the page is correct. A larger nominal number is not a reason to overlook an unclear configuration.
On this website, Price checked identifies a recorded amount for the named configuration. It is not a guarantee that the current checkout price is unchanged. Confirm the price, quantity, delivery charge, destination eligibility and seller terms in the purchase tab. The final order should be based on those current details.
Save the order confirmation and check the contents when the package arrives. Compare the delivered parts with the option you ordered and read the included instructions. If something is missing, damaged or different, use the support options attached to that order. Our shopping and order help page explains how to find the appropriate route.
10. Questions that make the choice easier.
Should I choose the largest total so I will not outgrow it?
Start with the individual range you can use for your intended movements. A heavier kit may have no equally light starting option. It is more useful to compare the exact bands and attachments than to assume that the biggest combined total is automatically the most versatile choice for you.
Can I combine attachments from different brands?
Do not assume compatibility from the connector shape alone. Check the requirements of both the equipment and the attachment, including the intended use and limits. If that information is missing, ask the relevant manufacturer or seller rather than creating a combination from appearance.
Can I use a band kit for an injury or rehabilitation?
That is a question for a qualified healthcare professional who understands your situation. Equipment sold with exercise examples does not provide an individual treatment plan. General buying and setup information should not be used to choose rehabilitation exercises or decide what load an injury can tolerate.
What is the most useful next step?
Choose the equipment format, inspect the exact parts and compare the lightest individual options. Then open the product page that matches that decision. A clear understanding of the kit gives you a better starting point than a headline resistance number on its own.
Compare HPYGN band sets ↗